Showing posts with label natural colourants. Show all posts

Wednesday, 17 August 2016

Funnel Pour Design - 2nd Attempt

Slab cut into logs

Following on from my natural colourants experiment, I poured the remaining batter into a slab mould using the funnel pour technique.

To do this technique, you need to slowly pour one colour into the mould from one spot.  Repeat this with another colour and pour directly in centre of the first colour.  Keep repeating this with the other colours.  To add variation to your design, pour different amounts of batter for each layer.

Below are some pictures of the cut slab.  Colourants used are: Cocoa Powder, Powdered Strawberry, Alkanet / Brazilian Purple Clay, Alkanet and Indigo (Last two failed to produce colour and thus appear as pale cream)


The Purple Brazilian Clay has turned out as a
 soft lavender colour

Tuesday, 16 August 2016

Experimenting With Colour

Left to Right:  Powdered Strawberry, Indigo, Alkanet and Brazilian Purple Clay,
Alkanet, Cocoa Powder

These are the results of my experiment on the weekend using natural ingredients to colour my cold processed soap.

My soap batter was made up of the following base oils.  Olive Oil, Coconut Oil, Rice Bran Oil & Cocoa Butter.

Into 500 ml of batter I added:

1. 2 tsp of Strawberry Powder - Initially there was a faint smell of strawberry. Four days later, there is no indication of the smell of strawberries, and the soap has turned a light tan colour.

2. 4 tsp of infused Indigo - Initially, there was a pale blue tint to the soap.  However, after four days, the soap appears white.  I don't think this will deepen in colour but will check back in a week.  Most likely, I will need to increase the quantity of infused oil.

3. 1 tsp Brazilian Purple Clay mixed with 2 tsp Infused Alkanet - I'm really loving this colour and I'm hoping this won't deepen too much.

4. 2 tsp Alkanet - Initially there was a very pale pink tinge to the soap but it seems I have completely missed the mark and used too little Alkanet infusion.  At the moment, I can't see any colour tint to this soap.  Back to the drawing boards for this one :-(

5.  2 tsp Cocoa Powder - This is a nice brown colour to the soap.  This one I think will darken over the next few days as it is exposed to the air.

Even though some of the colours haven't turned out how I thought they would, I am really happy with the colours produced and how creamy and complimentary they look all lined up together.

Sunday, 31 July 2016

Rainbow In My Kitchen

My natural colourant infused oils have finally been removed from the water baths after 6 hours.  Yes that's right, 2 hours later than I had planned thanks to me forgetting to turn the hob on and not realizing for 2 hours that the water baths were not getting any warmer!

Anyway, here are the results which my husband think are pretty cool

Infused Oils left to right:
Spirulina, Australian Bush Tomato, Alkanet,
Madder Root, Indigo & Turmeric 


Infusing Natural Colourants

I love using natural colourants in my soap making, not only can you get a gorgeous Symphony of colour variations, you also have the added bonus of knowing that they have been derived from nature.

So what's on the soapmaking menu today?

Clockwise from the top.
Spirulina, Paprika, Alkanet, Madder Root
Indigo, Turmeric, Australian Bush Tomato
Centre: Chlorophyll

I am infusing these colourants in light olive oil. As it is winter and I don't have alot of shelving space alongside windows, I'm opting for the warm infusing method.  This involves gently warming the oils slowly over 3-4 hours in simmering water using a double boiler.  It is important when using this method to not "cook" the oil.

What colours might I expect the infused oils to produce?

Spirulina - blue-green colour

Paprika - Salmon to orange colour

Alkanet - Pinkish red through to purplish blue

Madder Root - Light pink to earthy red

Indigo - Blue

Turmeric  - Lemony yellow to earthy gold.

Australian Bush Tomato - I'm not sure what to expect.  Perhaps an orange to red colour.

Chlorophyll - Pale green

Colourants waiting to be infused. Left to Right:
Spirulina, Australian Bush Tomato, Alkanet,
Madder Root, Indigo & Turmeric

You can see in this image that some of the colourants started to infuse themselves without the need of the water bath.

Thursday, 28 July 2016

Funnel Pour Design


With the left over batter from my 2nd attempt at creating a drop swirl design, I made a small batch of soap using the funnel pour technique.

Wowser!! I really love the end result. Cut into small cubes I think they look stunning.  It is amazing the results you can achieve using natural colourants and botanicals.

Tuesday, 26 July 2016

Drop Swirl Design - 2nd Attempt

Drop Swirl Design - Thin Trace

Here are the results of my second attempt at creating a drop swirl design.  This time I poured my batter at a thinner trace.

Colourants: Activated charcoal & paprika

Essential oil blend: Valencia Orange, Sweet Orange, Litsea Cuba (Maychang) and Patchouli


Sunday, 24 July 2016

Drop Swirl Design - 1st Attempt


Drop Swirl Design - I see a Jelly Fish

After finally waiting long enough for the soap to finish curing, here is my first attempt at the drop swirl technique.  The addition of clay sped up the trace time of the batter and the colours were 'plopped' in thicker by the end than what I would have liked.  I was also hoping for more distinction between the French green clay and purple Brazilian clay.  Having said that, I really quite like the patterns that were formed especially how there is a mix of solid and wispy patterns.

I'm interested to see what the colours will look like in a couple of weeks.

Unmoulding My Creative Acidents

Well what a bit of a mess I made with the batches of soap made last weekend.  I tried to be patient and despite the mishaps making the batches of soaps, I was really eager to see how my drop swirl attempts turned out.

All of the next day I was counting down the hours until I could get home and unmould my soap.  I had already woken up early to sneak a peak, I felt like a child on Christmas morning.  I got home from work as quickly as possible and got stuck into unmoulding my soap.  The smaller moulds which I poured left over batter into seemed fine but something was wrong with my larger loaf moulds.
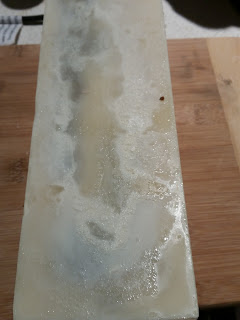
Underside of Soap unmoulded too early
  Little beads of what appeared to be moisture were seen to be   sitting on top of the loaves.  What could this be?  Was it    
  perspiration?  This didn't make sense as it is currently winter
  where I live.  Was the soap too lye heavy?  To be sure, I  
  decided to touch the soap with the tip of my tongue. ZAP!!  
  Hmm, I thought to try again in another spot.  ZAP!! ZAP!!
  By this stage thoughts of "Stop zapping yourself" chanted by
  Nelson from The Simpsons sprang to mind.  Don't laugh,  
  this is a real way to check to see if soap is too lye heavy and
  is known as the zap test (for obvious reasons).

  Having decided that my soap was too lye heavy, I decided to
  completely unmould the soap and shred for rebatching.  As I
  pulled the soap from the mould, I discovered a very thin  
  layer of oil on the bottom.  Could it have been possible that I
  unmoulded the soap too early??  My soap usually is ready to
  unmould after 24-30 hours.  Having resigned myself to failed
  soap, I thought I might as well leave it for a couple of extra  
  days.

After another 24 hours, I cautiously stuck my tongue on the soap. . . Nothing!!  No zapping for me 24 hours later, moisture on top disappeared and the thin layer of underneath had disappeared!!

What did this mean??  I was too impatient and should have waited longer.  I hadn't taken into consideration the fact that the room temperature where they were curing was a lot colder than usual.  I also didn't stop to think about how I had poured the batter into the mould when it was at only a thin trace just after emulsifying instead of my usual medium trace consistency.  These two factors would have added to a longer curing time.  In my haste to unmould too early, I now have an ugly pattern on the underside of one loaf caused from I believe where I had broken the 'seal' of the mould and the oil did not absorb / form into the soap evenly.


What Have I Got to Lose?

It has been months since I made any soap.  I guess I could say that I lost track of the time or that other priorities have taken place in my life.  The truth dawned on me last weekend.  Simply put, I have lost my nerve.  Since the end of last year, a few things occurred at work (AKA my non-soapy job) including a large scale restructure which resulted in 217 people being made redundant.  Although I kept my job, it has unsettled me, and I wonder how much longer before I too become redundant.  Until now I hadn't realised how much it had impacted on my life.  I know I have been keeping my head down and grateful that I have not lost my job but afraid to take risks (not reckless).  The redundancies have had a spillover effect into my home life and hobbies / interests.

For so long now, I have been making just honey and oatmeal soap.  Don't get me wrong; I love my honey and oatmeal soap but after awhile my soapmaking feels bland.

Last weekend I forced myself to get back in the saddle after many months of feeling 'lost'.  I felt extremely anxious about making soap and challenged myself to step out of my comfort zone by trying new techniques and blends.

Challenge 1: Drop swirl design using Brazilian purple clay and French green clay as colourants.  Scented, with a blend of lavender, spearmint and vanilla followed by a sprinkling of dried heather on top.

Challenge 2: A blend of sweet and valencia orange and patchouli for that hippy feeling mixed into a batch if soap coloured with activated charcoal and paprika.  Decorated on top with a feathered pattern.


Beautiful pattern on top moments before the clingwrap
 saga coloured with activated  charcoal and paprika.
I actually had panic attacks and many bouts of tears about what could go wrong and made mistakes because of my nerves.

Batch 1 - I forgot to add salt to harden my bars, and I didn't think to blend some water with the clay initially to break up clumps.  The portions of batter that were mixed with the clay started to become a thick trace quicker than the uncoloured batter.  I'm not sure if it was because of the clay or because I only poured my essential oil blend into these portions of the batter.  The drop swirl became more of a plop swirl.

Batch 2 - Forgot to add the Vitamin E.  Placed clingwrap over the loaf mould after making a pretty feathered pattern on top, only to watch the wrap sag and destroy the pattern.

I'm really not sure how these are going to turn out but I feel more relaxed now.

Saturday, 22 August 2015

* Part 3 of Three New Soaps * Naturally Color Cold Process Soap *

This is an oldie but one I really love.  MyCherriCola has combined natural colourants to create a truly exquisite looking bar of soap which goes to show that gorgeous creations can be achieved using what nature provides us.  The cranberry seeds add that 'wow' factor.

If you are interested in using natural colourants in your soap creations then check out MyCherriCola's other YouTube videos.  They have definitely inspired me to start experimenting after I get back from holidays.


https://youtu.be/pSa_-1oIqUY

Saturday, 12 July 2014

Cupcakes Version 2

The second batch of soap cupcakes have been made using a round nozzle, hmm not sure which one works out best.